Essential material
1- A spatula or similar (credit card, ID or if you have bought a spatula on our website)
2- A clean cloth
What will I receive?
You will receive a cardboard box or ring that protects the vinyl and accessories from damage. If you have purchased the spatula, it will also be inside the tube. If you are not going to apply until a few weeks after receiving the vinyl, remove it from the tube and store it flat. The vinyl is not good to store in humid places, rolled up for a long time or excessive time (months).
How to start?
You will check that the surface where you will stick the vinyl is in optimal condition, otherwise the durability of the vinyl will not be ensured since the adherence will not be correct. It must be dry, clean of impurities such as powders, liquids, stains, ...
It is advisable that if you are going to stick it on a wall that is painted, it is with plastic paint since it is the most recommended. Washable paints with silicone microparticles are not suitable, they can cause adhesion problems, it is important to take this into account.
We do not recommend applying our vinyls to freshly painted surfaces. If the vinyl application surface has been recently painted, we recommend a period of about 4-6 weeks before applying the vinyl.
Never clean the surface with glass cleaner. This product leaves particles contrary to the glue of the adhesive. It is advisable to clean with water or pharmacy alcohol or a dry paper, and leave it very dry.
The vinyl we sell accepts any type of smooth non-porous surface. If not, please contact info@estudisierra.es to seek solutions or clarify doubts.
* If you have bought a Slate Vinyl you have to stick it on an absolutely smooth surface. The slightest irregularity in the base will impair writing and erasure.
** Rolling up the vinyls to pack them in tubes can generate some wrinkles, basically in the transport paper that serves to facilitate their application. When you receive the package, we recommend you spread the vinyls and, if they have a conveyor, press again with a spatula or similar before applying. Vinyl is a flexible material and therefore any wrinkles that affect the paper have no effect on the vinyl once the application is done correctly.

Composition
The adhesive consists of 3 parts:
- Backing paper or silicone paper
- Trimmed Vinyl Sticker
- Mask or carrier
The conveyor is used to apply the adhesive on the desired surface easily.
Final result after mounting.
These adhesives do not have a background, that is, once placed the background is the surface where we have applied the adhesive. By carefully removing the transfer (3) once it is placed on the desired surface, only the trimmed adhesive remains.
How to stick the vinyl?
01) We will remove the seal from the wrapping tube, we will remove the vinyl and the copy. We will hang the vinyl on a table or on the floor and check that it fits what we wanted, depending on the size it will be delivered in one or more panels.
02) We will spatulate with force the entire surface of the conveyor paper to ensure that it adheres correctly to the vinyl. We will insist above all on the parts where the design has very small details.
03) We will take measurements to the wall and adjust the vinyl to the space.
04) We will fold about 5 centimeters from the top of the silicone paper.
05) We will glue the upper part to the wall, in order to fix the mural before continuing to remove the silicone paper.
06) Next, we will remove the protector from the adhesive and with the spatula or similar we will glue the vinyl to the support. The direction of the spatula will always be from the center to the sides.
07) At the end we will make several passes with the spatula over the conveyor to ensure the perfect grip of the vinyl.
In digital printing vinyls, the first pass of the spatula has to be smooth since the vinyl is repositionable and in any case you can peel it off until it fits perfectly.
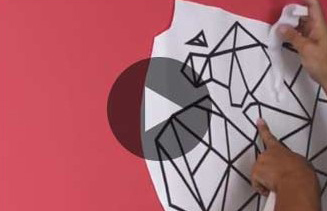
08) The vinyl is already glued. Now we only need to remove the conveyor. We will be pulling the protractor at an angle of 180 degrees to ensure the good fixation of the vinyl.
Some vinyls with images do not have a protractor and therefore in step 7 they will have finished their placement.

